

the blog
welcome to

looking for something specific? find it here
This blog will be your beginners guide to the gym. We’ll be diving into equipment setup and weights and how to increase your confidence in the gym.
Even as a seasoned trainer and trainee, I have felt anxious in new gym environments.
So I can only assume that beginners feel like a fish out of water. You may even feel like an imposter, or you’re just going to keep messing it up. Maybe you feel like all eyes are on you…
That’s simply not a great head space to enter your workout in.
So let’s go ahead and change that…
I’m Annie Miller, certified Strength and Conditioning Specialist. I help you learn as you train and enjoy your lifts again.
Which is literally my hope behind today’s blog. I want you to have the tools and knowledge you need to move through the awkward fear of the gym. Quite frankly you deserve to be there.
Make sure you read through the end of this blog. We are going to go over some spitfire questions from some of my audience on Instagram.
Prefer to learn on video? Watch here:
To be clear, this is not a blog on first time gym goers etiquette.
When I asked my audience to reflect back to their beginner gym days… Many of the questions they had were in fact in regards to etiquette and behavior type questions.
Today’s blog is about your confidence or your client’s confidence in using equipment at the gym.
I don’t have everything in my home gym that you would see in a commercial gym. So if you are interested in seeing everything in my home gym… Be sure to check out my full garage gym tour video HERE.
To begin, let’s get started with the Rack.
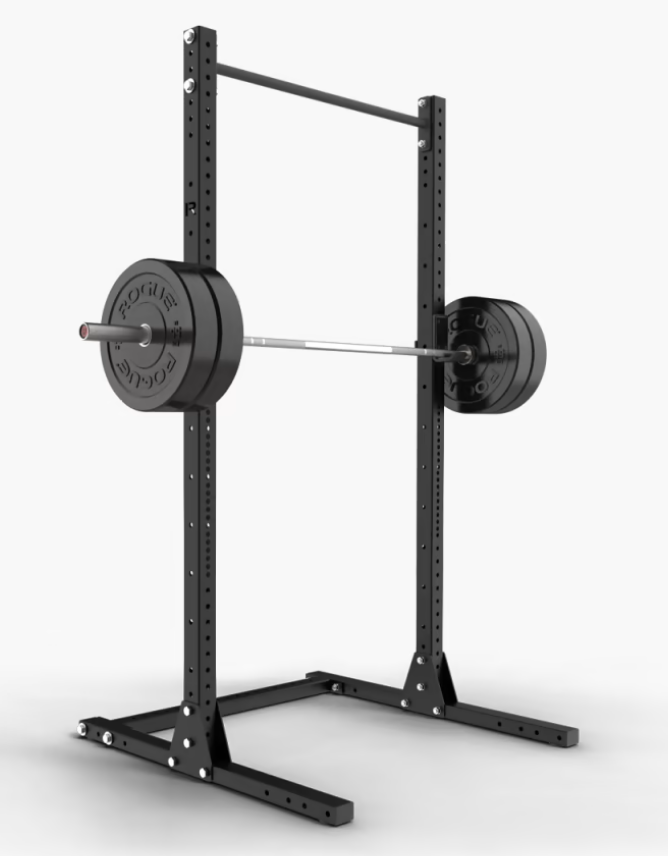
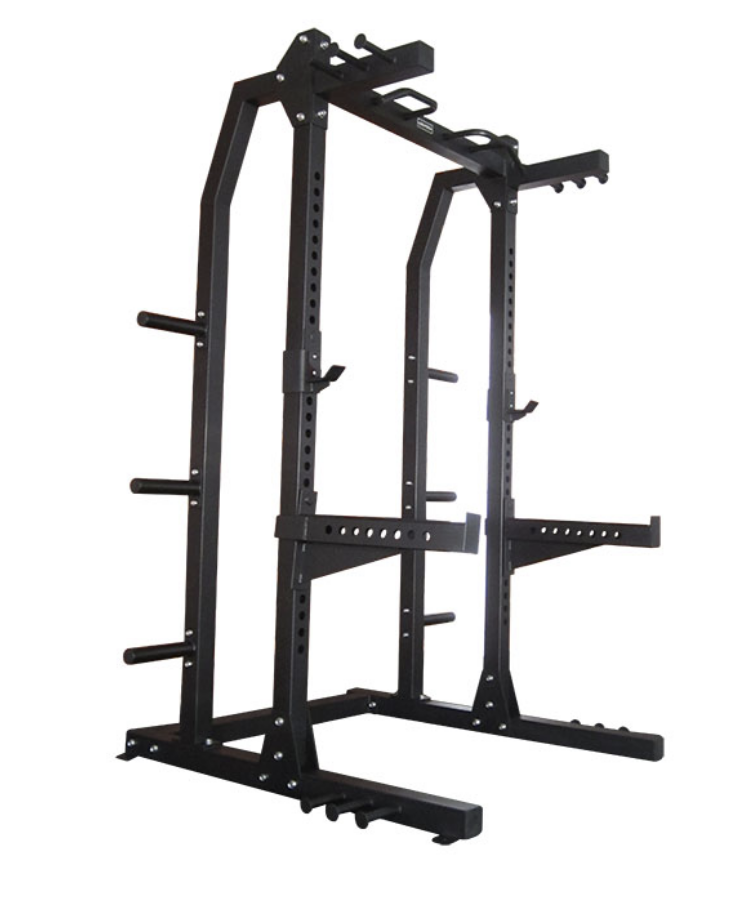
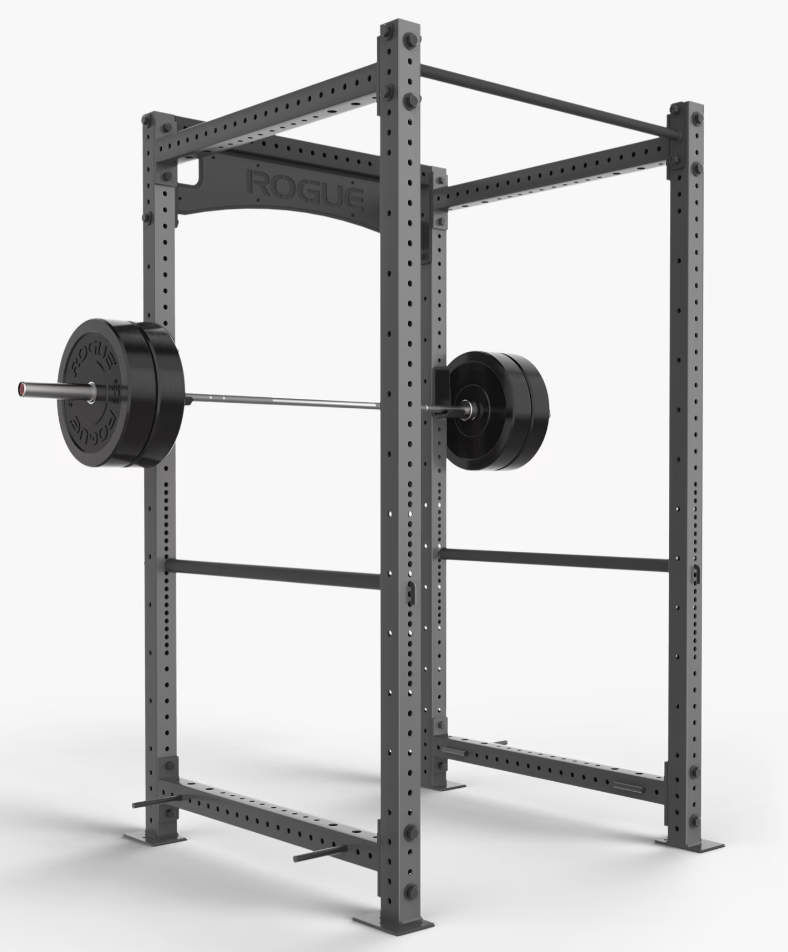
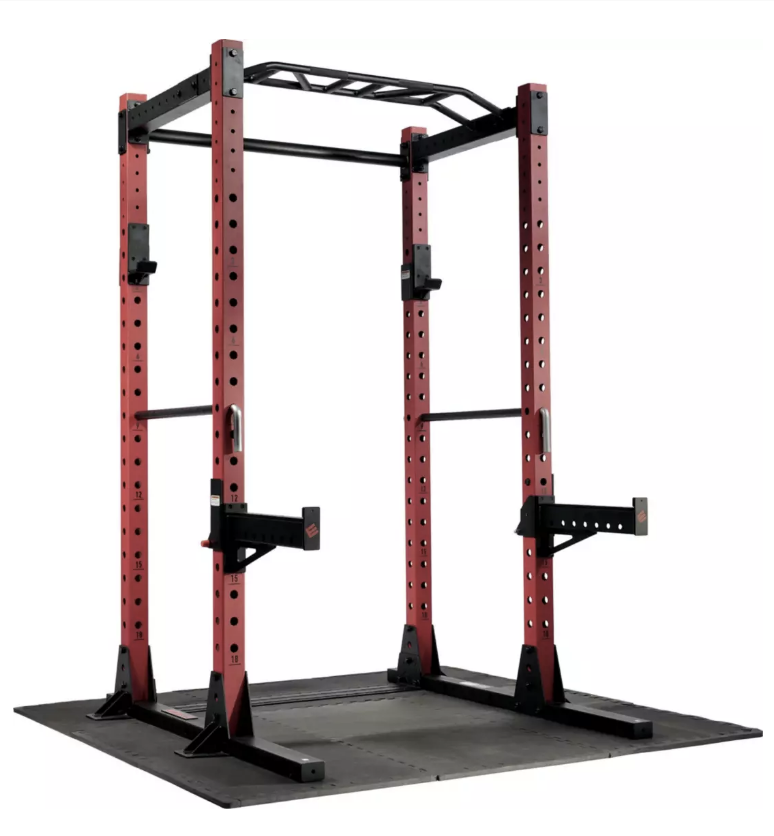
(HALF RACKS)
(FULL RACKS)
You generally see half racks or full racks at the gym.
At home, I use a half rack with only two uprights rather than four. The rack is where many of the free weight movements will happen:
- Pull up squats
- Overhead press
- Not shrugs or curls
Do appropriate movements in appropriate places.
We will discuss that in the etiquette blog that I make in the future.
Anatomy of The Rack:
On the uprights you’re going to see holes and numbers. These are where we can attach things to the uprights like the J hooks.
The J hooks are where the barbell is racked and unracked from.
Racked is the term that we use to refer to where the bar is held even on your body. We have a back rack and a front rack position.
When the bar is in the rack like this, it is racked. When the bar is being taken out of the rack, it is being unracked.
If working with a trainer, you might have heard them say and go ahead and re-rack it.
This is just simply returning the barbell to the J hooks.
These are your safety bars or your pins. These might look different depending on the rack that you’re in. In a full rack, it might be metal poles that rest between the front and the rear upright.
The usage of these safety bars or safety pins should be used during squatting or benching if possible.
If you’re in a fixed half rack… Then bench pressing is not possible and stationary bars are too high for squatting for most people. This rack in the image above was most functional for things like RDLs (Romanian Deadlifts) off the front or overhead press in the rack.
The safety pins should be set roughly one inch or so below your bottom position.
Whether that is bench press or a squatting movement, please be sure to test the height of these with an empty barbell before you actually load the barbell and use it for your working sets.
Their function, as the name suggests, is for safety for when you need to bail out of a lift for whatever reason. The most common reason being that the weight is too heavy and you get pinned at the bottom of the movement or scared and need to exit stage lift.
I have found with many of my one-on-one clients over the years that they aren’t lifting loads that they’d likely fail with anyway, yet having the pin set gives them some confidence under the barbell. It will make them feel safe. Go figure.
Before we move on to the actual movements done inside of the rack with a barbell, I want to cover doing pull-ups in the rack when getting in and out of a banded pull-up.
Always start from an elevated position if possible. Stand on a bench or a box or even the safety pins if they are secure or if you need assistance and don’t have bands, then go ahead and just use an assisted pull-up machine.
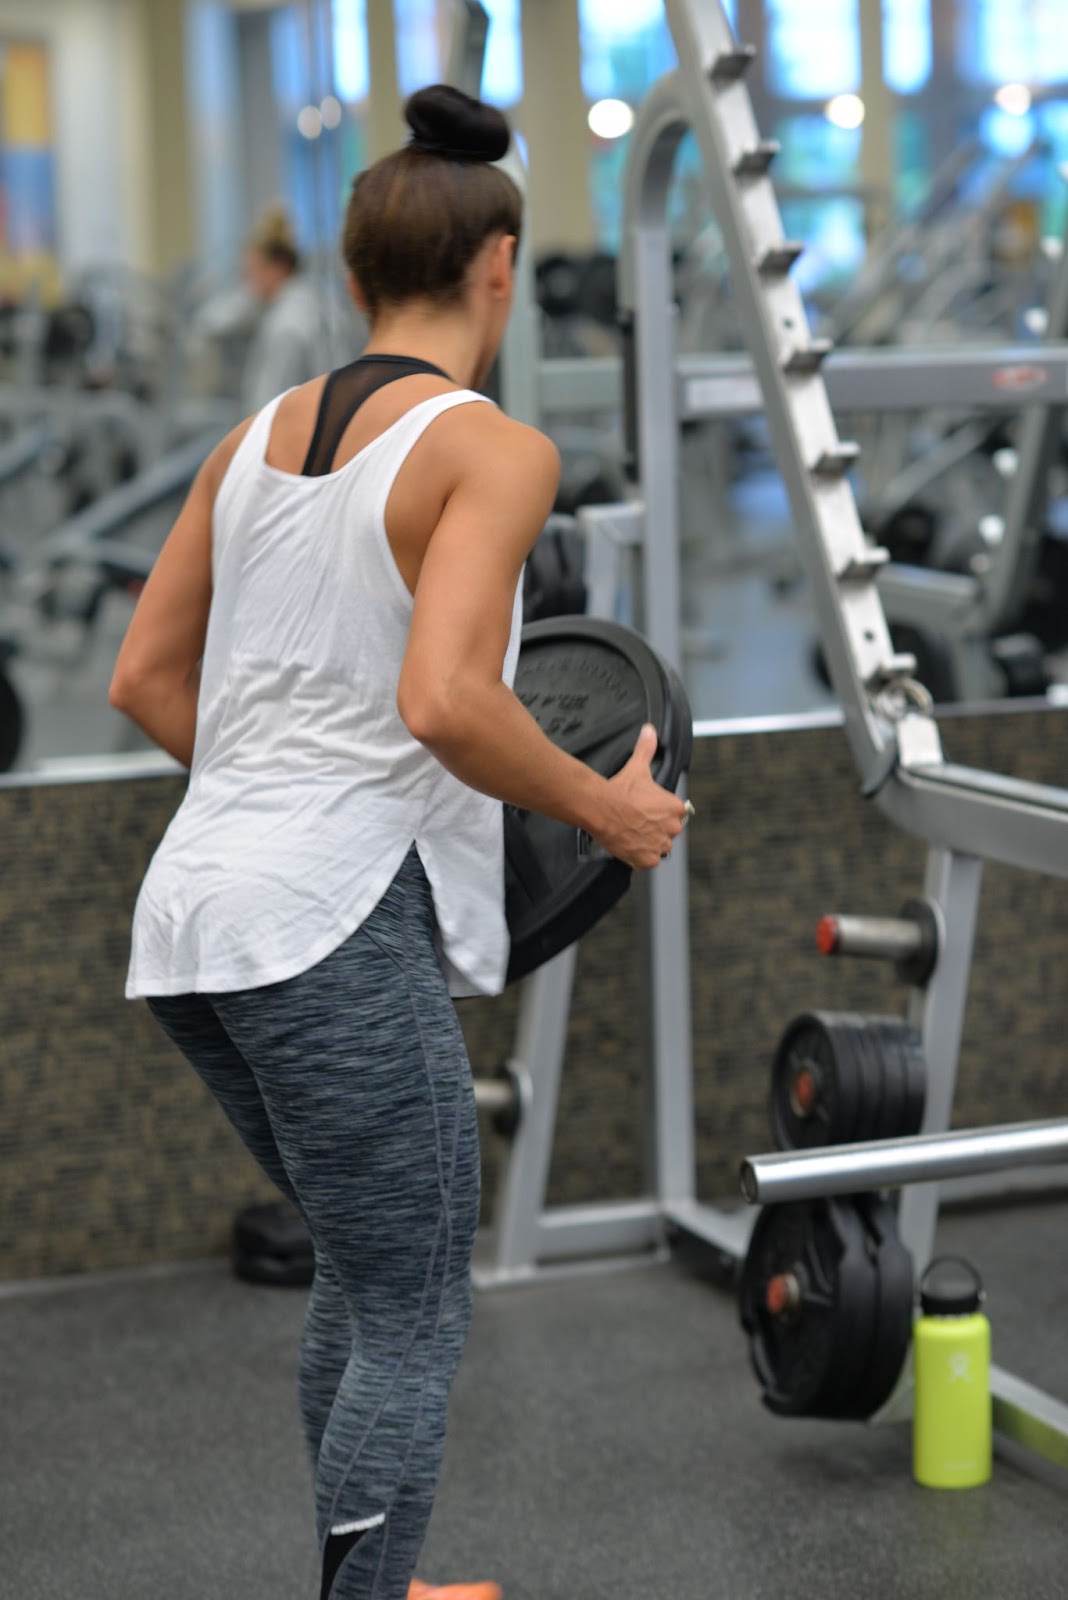
These are not actually a part of the rack. They’re called collars. If you are doing any barbell work in the rack or out of the rack, you’re likely going to be using them. Collars go on the end of a loaded barbell. This stops any weight you have on the bar from shifting or sliding off.
This is not always for bench press though, particularly if you are benching without a spotter.
Keeping the weights free to slide off either end is actually safest in lifting near maximal loads.
That way if you get pinned without safety bars or a spotter… You can tilt the barbell to one side and let the weights slide off. Then tilt to the other side and let the other weights slide off.
I would rather you have a spotter or safety bars to be clear when benching. But if not, don’t use collars. Nothing will make you feel more weak than a classic metal spring collar.
Using collars is really just a risk analysis for yourself or your clients. Generally, I don’t use them at all. Unless I am moving maximal loads in overhead press squat and hip thrust for bench and deadlift, I tend to just leave them off.
That is based on the variance in excess side to side movements that I find with these exercises. Therefore, shifts in weight on the bar for squat and overhead press. There is an un-racking and a physical stepping back before actually getting your feet set for the movement.
That just means that there’s more room for the plates to slide from one end of the barbell to the other.
This may also make sense for touch and go deadlifts in the setup for hip thrusts.
Rolling the weight forward and backward in that setup process can move the plates as well. Thus, in my opinion, collars or clips make sense.
Now you are familiar with the rack. So let’s get the barbell from the rack (without embarrassing yourself) when you’re un-racking and re-racking the barbell for any exercise.
Pro Tip:
Always minimize excess movement for the squat or the overhead press.
Before your exercises, get good and set underneath the bar, whether you’re doing a squatting or a pressing pattern. You should be locked and loaded before actually removing the barbell from the rack.
Stepping back should only be to create space between you and the J hooks before doing whatever movement is programmed.
Take your time here.
Don’t feel bad for working this section of a movement. The setup should be the same every time. If you can control that once you’re done with the movement.
To get the barbell back into the rack (to re-rack the weight), no matter the movement you’re going to:
- Step in
- Drive the barbell into the rack and then drop directly down
- Keeping forward pressure the whole time
When you get it right and gain some confidence, it’s one of the most satisfying sounds ever.
To backtrack a little bit… It will be vital and very helpful for you to determine your setup heights for different movements inside the rack.
Let’s look at the setup for the rack.
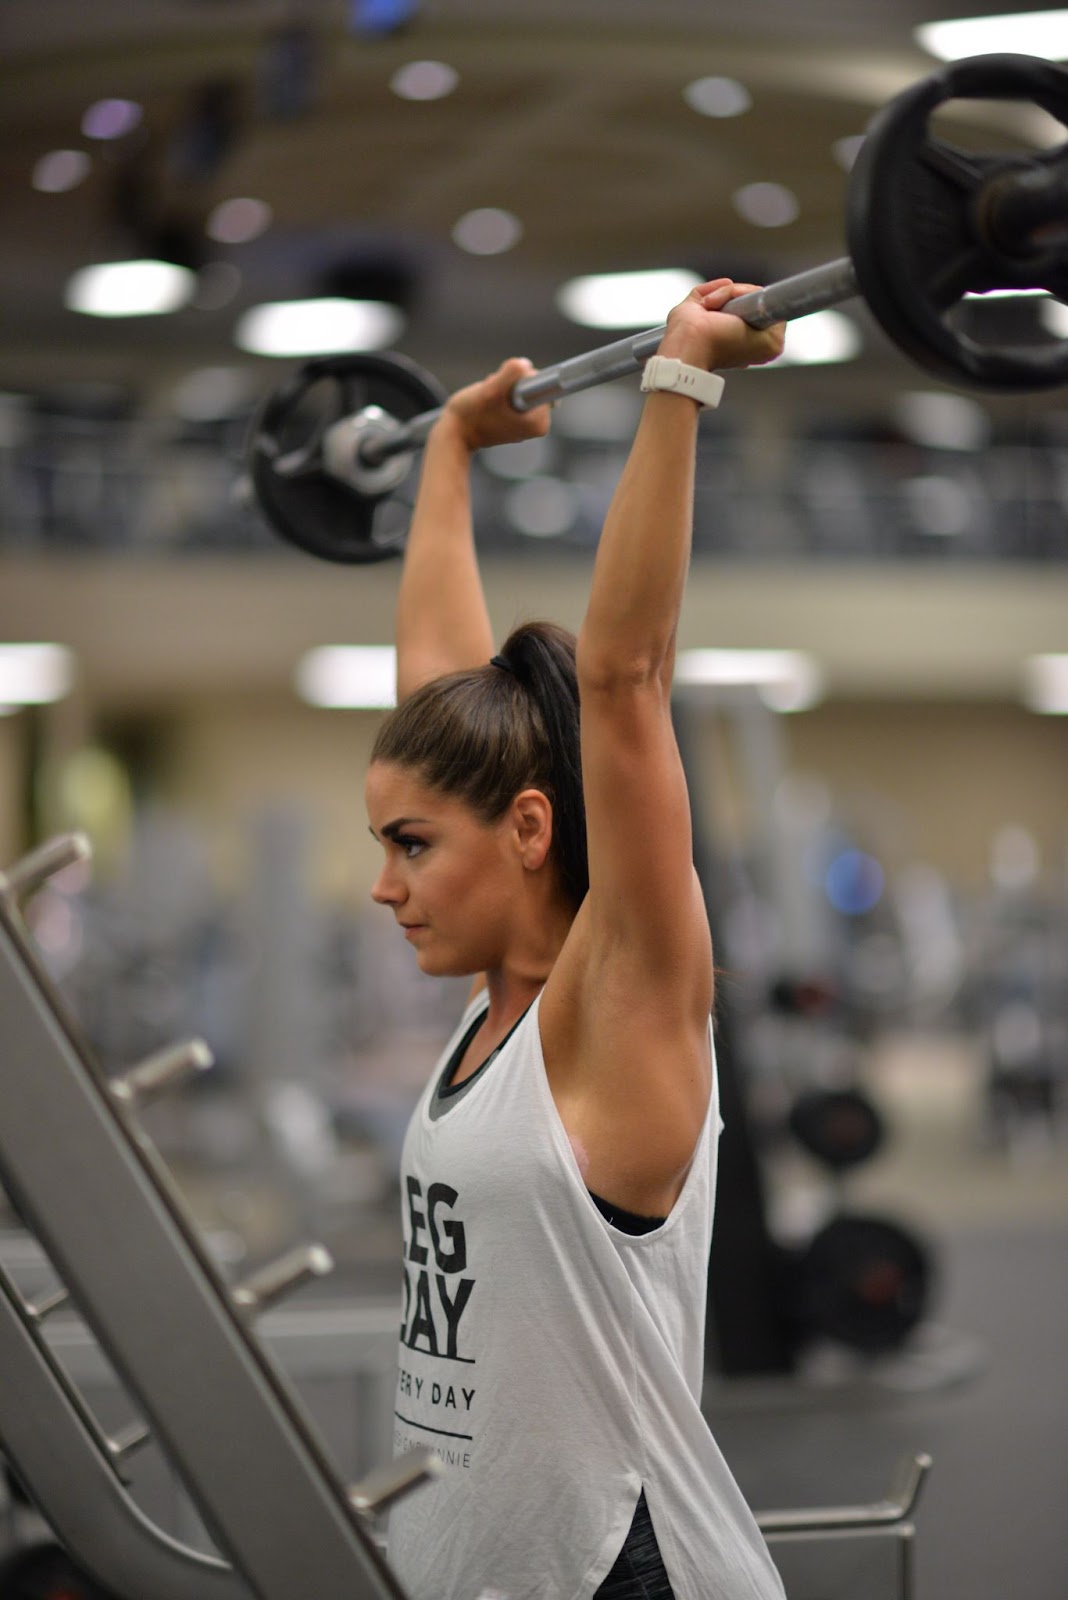
For squat overhead press and bench press:
The barbell should always be at the top of your armpit crease for your overhead press and your squat. So the J hook position is what’s going to be at that armpit crease level.
You should NEVER have to go up onto your tippy toes in order to un-rack the barbell. Whether it’s for squats, overhead press, or anything being racked in that front or back rack position.
Likewise, for bench press, you should never have to unpack your shoulders in order to unrack the weight. We lose stability and you just risk unnecessary injury when we have to get unset from those starting positions inside the rack. Most racks have numbers for reference as I mentioned earlier.
This will be how you remember your typical setup for these different movements.
*Don’t be afraid to adjust if needed.
The height should allow you to rack and unrack the weight seamlessly.
For bench press, your eyes should be directly underneath the bar as a reference point.
When you get set up, let the rest fall into place. Once you unrack the barbell, it’s going to be directly over the top of your shoulders. Then as you lower the barbell down, it should end at the sternum or the bottom of your sports bra. Then return back to being stacked over your shoulders at the top.
That is all for the rack and the barbell.
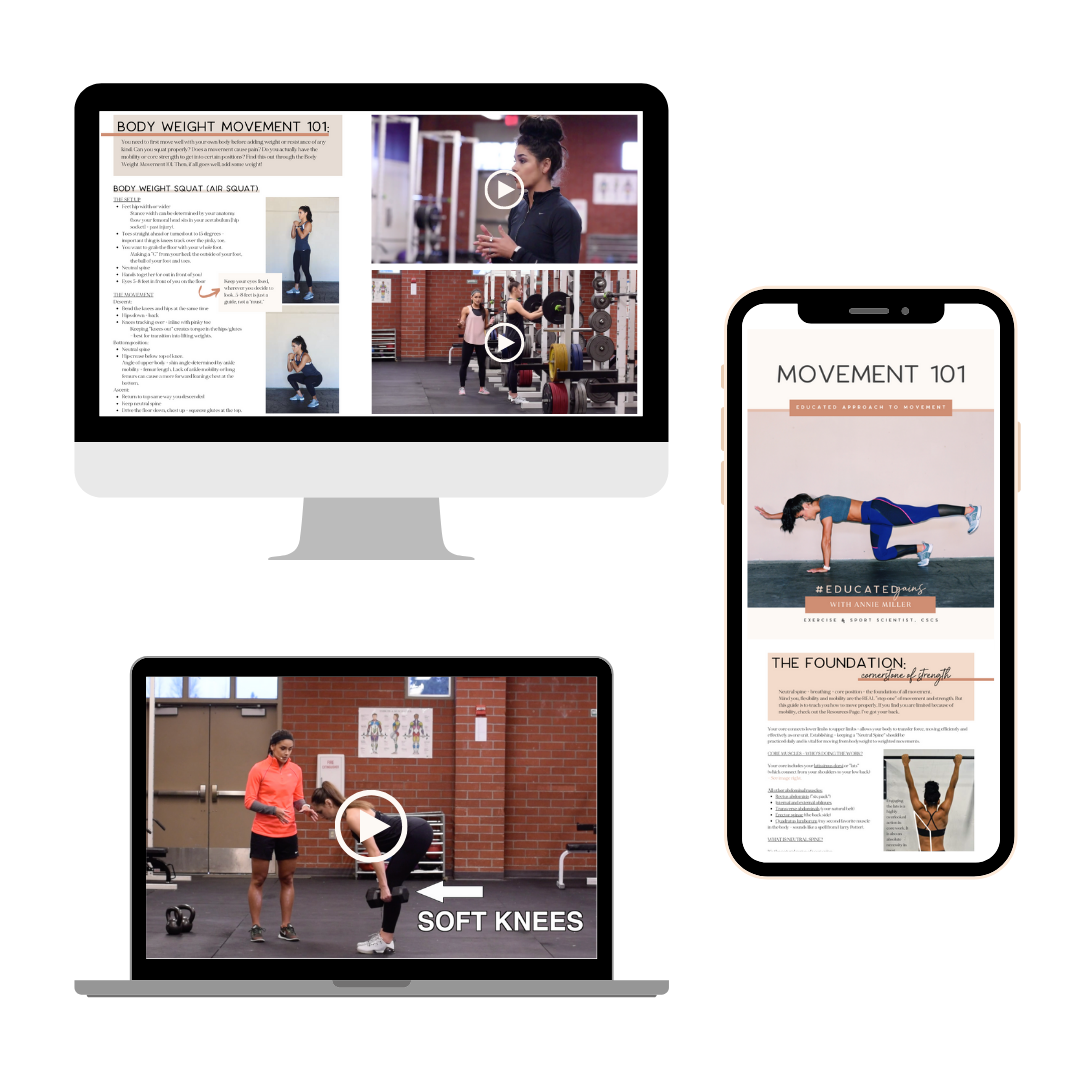
If you need more extensive instruction on setup and guidance through different exercises…Check out Movement 101 HERE. It’s my movement encyclopedia with demo videos and coaching videos. Plus queuing for over 100 exercises from body weight to dumbbell to barbell.
Now we’re going to go over the Flat Bench or Adjustable Bench as a piece of equipment.
Benches are going to come in various heights. Generally speaking, you want your bench to be at or below your knee level.
If that’s not the case, you can always elevate your feet on plates or wedges if needed. That applies to bench, hip thrust, Bulgarian split squats, and more exercises.
For the love of all things holy…
The SMALL part of the bench is the SEAT that is not the head.
Some benches are not mobile or they don’t have wheels. So before embarrassing yourself by attempting to move it… Be sure to check first one end of the bench will have wheels.
Normally that is at the head of the bench. Generally the end that is the seat is going to have the handle to lift and actually move the bench.
Pick that shit up like you mean it. Execute a 40 point turn if you have to. Just do it with confidence, set it down, and get to work.
Let’s go over some of the basics that tend to cause people to hesitate when approaching a machine.
In a gym setting, if you’re new to a machine or a piece of equipment, you’ll get it! I just want you to know that you can leave time and space to mess around and find the most comfortable setup with a piece of equipment. People will literally sit on these machines and text 17 friends between sets. You can take 2 freaking minutes to properly get set up with a machine.
No one is watching, and if they are, they probably think that their shit doesn’t stink and they’re wrong.
Generally speaking, every machine has a seat adjustment, an apparatus adjustment, and then the actual load adjustment as well.
If you get on a machine and it feels wonky, look for options to switch it up. Take a breath, look at the seat. Can you move the seat up or down, forward or backward? Go ahead and try that first.
If you happen to be working the arms, back or legs, can you bring the end of the lever closer or further away from you? Go ahead and see if that helps.
Typically, the adjustment will be via a pull in and out pin situation. Sometimes they’re stuck or too sticky to move, which is momentarily embarrassing. When you realize that you can’t move it, you can’t adjust it, it happens. Just move along with the next exercise.
I am very pro machines.
There are a lot of gaps that you can fill within training by using them. Don’t be afraid, but get the setup right.
The last thing I want to cover is actually a movement.
I know I said I wasn’t going to go over in this blog, but this particular movement stops a lot of women in particular. So I’m going to give it some space.
… Box jumps.
These are a fear for so many women and I don’t think that they need to be.
*NOTE: It’s not about the box height.
Your goal is explosiveness to generate as much force down into the floor as possible to use your stretch reflex and to jump as high as possible.
You can land softly on, not that you have to bring your knees up to your chest and land in a deep squat. In order to complete the jump, be sure to land soft or with soft knees and repeat. That’s it.
Join The Discussion:
If there’s something that I haven’t covered about the gym that happens to intimidate you, drop it down in the comments below and hopefully I can help.
Now For The Bonus, Spitfire Q&A:
These questions are straight from my Instagram question boxes!
Question #1:
Are calories in the cardiac machines accurate? And why might I need the heart rate handles?
Answer #1:
I assume heart rate handles are referring to the metal sensors that you might see in cardio machines at the gym. These are taking your pulse and they can be wildly inaccurate. I suggest wearing, if it’s within your budget, a heart rate monitor like polar.
Make sure to check out my video in a few weeks on a polar heart rate monitor and chest strap. I will do a full review of who it’s for, why you might use it, and how it can work with your strength training. These allow you to know where your heart rate is, at what zone you’re in, etc. If that’s something that you are paying attention to within your conditioning.
To answer the other part of the question, know the calories are very generic and not accurate on these machines. You should not be depending on them. I do not recommend it. Zero out of five stars.
Question #2:
Is there a different advantage between huge barbell plates and smaller ones with the same weight?
Answer #2:
I’m going to assume that this person means bumper plates and then all other metal or plastic types of plates in comparable loads for deadlift or Olympic lifting. You can pull from the same height and the setup position regardless of the load, which is a huge win for movement proficiency with bumper plates, squat, bench overhead press.
That just looks like you’re lifting more potentially if you’re using bumper plates versus the metal plates that are smaller but the same load as the bumper plates. If you want to be able to bounce weight off of the floor in a deadlift rapid response or in a touch and go style, then metal weights are going to be less ideal for that movement.
For something like a hip thrust, regardless of the weight, this allows you to roll the bar over your hips comfortably and have room to do so.
Again, that’s using bumper plates versus metal plates that are under 45 pounds, so that’s the real difference. There’s not a benefit from a weightlifting or putting on muscle size standpoint. It is more just what makes sense for the move movement that you’re doing.
Bumper plates make sense for some movements where metal plates are fine. For others, it depends on what you’re into.
If you’re doing hypertrophy or strength training, then this blog should give you a pretty solid place to start from no matter how much information you take in.
Remember, the most valuable learning is going to happen on the floor through the reps, through the experience, so go get some and I will catch you in the next blog.
I hope you enjoyed these educated gains!


I'm an adventurous introvert from Vancouver, Washington who lives on sleep + "me time." I'm a lover of lifting weights, dinosaurs, real talk and traveling with my husband. I am here to help you move better, lift more, bust the myths of the fitness industry, and inspire you to love the process.
Hey you,
The name's Annie & you're reading my thoughts. Let's get acquainted.
the whole story >


looking for something specific? find it here
THE LINKS BELOW ARE AFFILIATE LINKS
SKIN CARE
Nutrition
brands I love


working against gravity
Fre skin care
favorites
blue light blockers

klassy network
code: fdba saves you 15% off
online TRAINERS

save $50
code: ANNIE saves you 20% off
You love my style, trust my reviews, and want more Annie Miller Concepts vibes in your life? Shop my favorite brands. You get awesome products and yours truly gets a little kick-back.
supplements

code annie
free flexy gains

3 Day Mobility + Core
free download
free biz gains
